写于2024-10-3-00:46
记录一次把ubnutu20.04de nvidia 驱动搞坏又修复,加上对ubuntu显卡驱动和独显/混显,lightdm/gdm3桌面管理器的理解。
由于webots仿真卡死崩溃,就找到一篇博客说:
glxinfo | grep OpenGL
确实opengl输出的是intel集显,使用
sudo prime-select nvidia
再次查看输出:
zgh@zgh-Legion-Y7000P-IAH7:~$ glxinfo | grep OpenGL
OpenGL vendor string: Mesa/X.org
OpenGL renderer string: llvmpipe (LLVM 12.0.0, 256 bits)
虽然不是nvidia,但好歹不是intel了,而且仿真不会卡死崩溃了
sudo systemctl restart gdm3

/etc/X11/xorg.conf

xrandr

glxinfo | grep OpenGL

nvidia-settings
####sudo nvidia-xconfig 不要用这个命令,它会生成什么Xorg的配置文件,把你之前能用的显示配置覆盖掉
/etc/X11/xorg.conf内容:
 # nvidia-xconfig: X configuration file generated by nvidia-xconfig
# nvidia-xconfig:  version 535.154.05


Section "ServerLayout"
    Identifier     "Layout0"
    Screen      0  "Screen0" 0 0
    InputDevice    "Keyboard0" "CoreKeyboard"
    InputDevice    "Mouse0" "CorePointer"
EndSection

Section "Files"
EndSection

Section "InputDevice"

    # generated from default
    Identifier     "Mouse0"
    Driver         "mouse"
    Option         "Protocol" "auto"
    Option         "Device" "/dev/psaux"
    Option         "Emulate3Buttons" "no"
    Option         "ZAxisMapping" "4 5"
EndSection

Section "InputDevice"

    # generated from default
    Identifier     "Keyboard0"
    Driver         "kbd"
EndSection

Section "Monitor"
    Identifier     "Monitor0"
    VendorName     "Unknown"
    ModelName      "Unknown"
    Option         "DPMS"
EndSection

Section "Device"
    Identifier     "Device0"
    Driver         "nvidia"
    VendorName     "NVIDIA Corporation"
    BusID          "PCI:1:0:0"
EndSection

Section "Screen"
    Identifier     "Screen0"
    Device         "Device0"  #就是要用独立显卡启动
    Monitor        "Monitor0"
    DefaultDepth    24
    SubSection     "Display"
        Depth       24
    EndSubSection
EndSection
如果这样写:
Section "Device"
    Identifier     "Device0"
    Driver         "nvidia"
    VendorName     "NVIDIA Corporation"
    BusID          "PCI:1:0:0"
EndSection

Section "Screen"
    Identifier     "Screen0"
    Device         "Device1"
    Monitor        "Monitor0"
    DefaultDepth    24
    SubSection     "Display"
        Depth       24
    EndSubSection
EndSection

Section "Device"
        Identifier  "Device1"
        Driver      "intel"
        VendorName  "Intel Corporation"
        Option      "TripleBuffer" "true"
        Option      "TearFree"     "true"
        Option      "DRI"          "false"   #这三条都是为了防止集显显示桌面的时候画面割裂
        BusID       "PCI:0:2:0"
EndSection
是以Intel集显启动,确实有用
但是此时bios里设置的混合显示,只会使用集显,nvidia-settings内容错误,只能显示笔记本屏幕,无法连接外接显示器。
然后又换lightdm试一试,发现还是只能显示一个,甚至只能显示外接屏幕,拔去外接屏幕,笔记本屏幕也不会亮。
最后又换回了dgm3
##总结:
#只有bios独立显卡 + / etc/X11/xorg.conf使用独立显卡 +dgm3才能正常使用。
2024-10-3-14:44
这样确实可以用,但是独显功耗太大,而且不知道为什么webots非常卡,看来还是不对
bios混显模式+删除xorg.conf
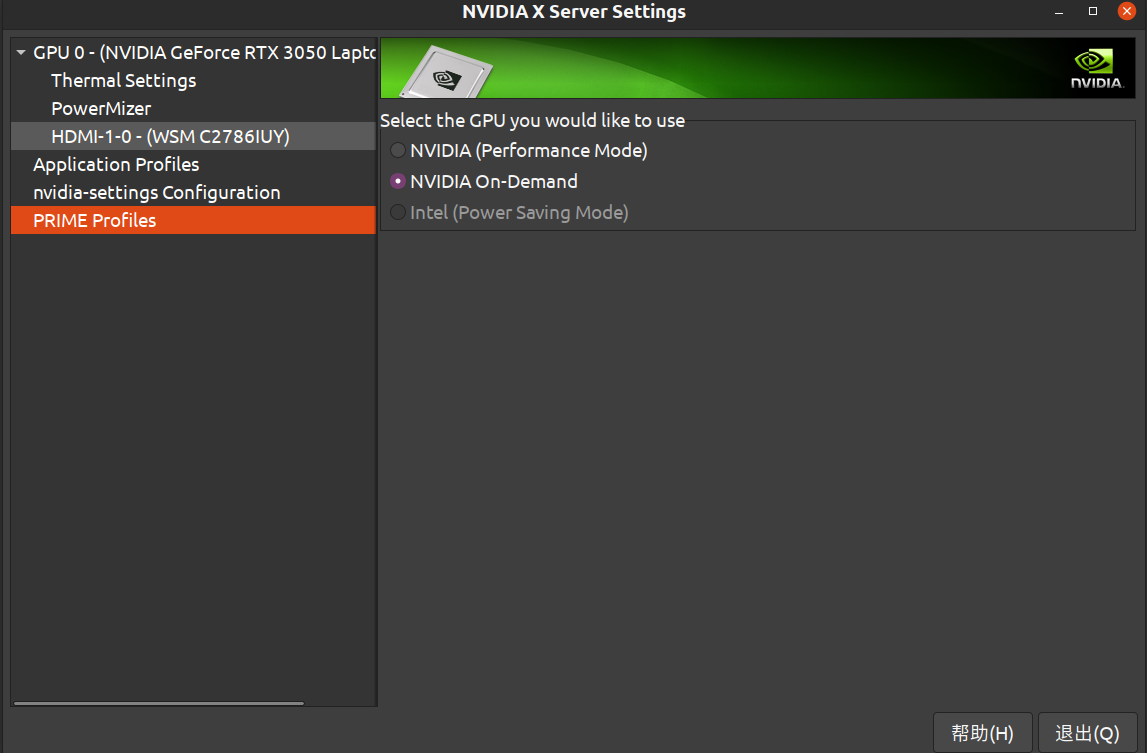
先修改xorg.conf,把GPU,Intel标清,然后用Intel显示,进入桌面,看到nvidia-settings能选择这三种模式了(这是还不是很对,左面只有一个PRIME Profiles)
重启
在tty里把xorg.conf文件rm掉,
直接reboot
就一切正常了,看一下:


nvidia-smi也正常了
2024-10-4-10:29
zgh@zgh-Legion-Y7000P-IAH7:~$ __NV_PRIME_RENDER_OFFLOAD=1 vkcube
zgh@zgh-Legion-Y7000P-IAH7:~$ __NV_PRIME_RENDER_OFFLOAD=1 zed
这个是nvidia gpu的详细官方文档primerenderoffload
对于on-demand模式无法正常切换的,可以通过命令手动切换,上面的zed就是例子,zed需要用nvidia gpu的vulkan,
这里面有vulkan.opengl等等
###这个文档真的很有用
Conky闪烁:
conky -b -q -c /home/zgh/.config/conky/TC-100/TC-100/tc100-green
//conky --double-buffer
-b | --double-buffer Use double buffering (eliminates "flicker"). Only available with build flag BUILD_X11 enabled.
启用双缓冲后,Conky 的更新会显得更加平滑,尤其是在你频繁更新数据或显示动态内容时,减少闪烁或图形重绘带来的不适感。
zgh@zgh-Legion-Y7000P-IAH7:~/.config/conky/Shelyak-Dark$ killall conky